
Journal of the Modern
Battles Club
Published bi-monthly. Third issue: November 2002
Editor-in-Chief: Sgt.
Tom Ciampa
Publisher: Chuan Uy Nguyen Duc Tho
Contents of this issue:
Grunt School: Tips for the Squad Battles Beginner (Tactics)
Acro-Nym-Mania (Vietnam Trivia)
American M18 Claymore Mine (Weapons)
Did you know? (Vietnam Trivia)
The Odd Angry Shot (Film Review)
Prizes for the 2nd Trivia Contest
From the President
Gentlemen, after one and a half year of existence, the club seems about ready to undergo some changes ... a new generation is stepping forward to take the reigns, and I welcome this development. Sergeant Glyn Hargreaves, who has served this club as game record keeper and Secretary of the Interior from the very first day has handed this responsible business over to PFC Stefan Reuter of the U.S. Army, 1st Squad. My sincerest thanks for both of them. Likewise, the patriotic squad leader of the 7/3/2 NVA has placed his squad in the able hands of Binh Nhat David Spittell and Binh Nhi Charles-Jean Gérard, both members of the younger generation of the club. I do hope that Stefan, David, and Charles-Jean experience not only the burden, but also the enjoyment of contributing to the club administration, and that they receive the support they deserve from the other members.
Yet again "Sarge" Ciampa has managed to present the club with an informative and entertaining issue of the Line of Demarcation. Not for the first time, the articles come mainly from the editor himself--maybe that's unavoidable, but some more contributions from among the ranks would certainly be most welcome and make this club journal an even more lively and interesting read. Especially, the squad and platoon leaders are encouraged to write short paragraphs on the exploits of their squads in the preceding months--some healthy competition between the squads could thus be furthered, and it would also give the squad members themselves the feeling that their efforts don't go unnoticed.
The central element of this issue is the elaborate squad battles introduction by LCpl. Frank Harmon Jr.--almost a tactics manual to the squad battles games, applicable not only for SBV and TOD, but the WW II games The Proud and The Few and Eagles Strike! as well. It was originally planned to be published in several parts, but as it is at the moment quite uncertain that there will be further issues of the LOD, Sarge Ciampa has decided to give you the entire article this time.
But--I do hope you will not let it come to that.
Now, Gentlemen, I hope you have fun with this third issue of the LOD.
Sincerely,
Chuan Uy Nguyen
Duc Tho
President, MBC
aka Dierk Walter
Grunt School
Tips for the Squad Battles Beginner
by LCpl. Frank "echo-four" Harmon
Editor's Note: This article on Squad Battle game tactics was first published by F. Lee Harmon, Jr. on the TheBlitz wargame site. Frank and I have been playtesting existing The Proud and the Few scenarios in an attempt to improve their balance. He was kind of enough to send me this very well done treatise to help improve my game. I got the idea to publish it in the LOD and he graciously consented. Although it still resides on www.theblitz.org its publication here in the LOD will hopefully give his work even more exposure in the Modern Battles Club where his insights and observations should prove to be of interest and useful to its members. Frank, a regular modern day Renaissance Man, is an ex-Marine, a prolific gamer, highly knowlegeable, a well-read military historian, and a recent addition to Bill Wilder's playtesting team. Here presented in full length is Frank Harmon's Grunt School. Thanks Frank!
"All right listen up, you people will not die on me in combat. You freaking
new guys will do everything to prove me wrong. You'll walk on trails, kick cans,
sleep on post, smoke dope and diddy bop through the bush like you were back
on the block. While on guard at night you'll write letters, and think about
your girl back home, well forget her. This is Han. You have no worries people,
but him... and me"
Sgt. Frantz "Hamburger Hill"
Foreword
A while ago during a PBEM game, I wrote a friend of mine a very detailed message concerning the application of basic infantry tactics to the Squad Battles series of games. Since his "baptism of fire" he has e-mailed me on a few separate occasions asking for a copy of this same text for distribution to other new players. Due to the requests of these people, I am attempting to reproduce this long dead e-mail by turning it into a reference article those progresses from a basic to somewhat detailed reference for all newcomers to the Squad Battles series.
In advance, let it be known that in my own opinion I am not an "expert" at these simulations. Judging myself fairly however, I have grown at least moderately skilled. I have been playing these games with a .650 -.750 win percentage against human opponents by applying the tactics I was taught while in the real world Infantry (USMC- E 2/3) and applying a basic knowledge of the game system. Others who have developed their own styles may tend to disagree with what is written below. This is to be expected and ultimately encouraged. The following words are as much opinions as they are tactics.
This article is basic. A "boot camp" of sorts. In my next article, I plan to cover tactics further by addressing the patrol and contact formations used by US infantry forces in combat.
The Squad Battles series of games
It is keen to remember that while the Squad Battles series uses the same basic rules format, the 4 games cover three separate fronts and three distinct fighting styles during two very different wars. Despite this fact, a basic guideline for conducting Infantry operations does exist. It is up to the individual player to tweak these guidelines to the unique situations that each game may offer.
Vietnam and Tour of Duty, which cover Southeast Asia, are obviously very similar. It is rather safe to assume that tactics that are effective and succeed in one these games will most likely do the same in the other.
Proud and Few and Eagles Strike while both covering WW2, deal with two completely different theaters and fighting styles. Therefore certain tactics that are effective vs. the IJA in the Pacific may be suicide vs. the Wehrmacht in Western Europe, and vice versa.
Impossible scenarios?
Newer players often complain that victory is impossible in the majority of
Squad Battles scenarios.
Due to the level of detail of these games this continues to be a common train
of thought amongst these types of people. If one expects to jump right in and
immediately start laying waste to all he opposes, then this is definitely true.
I was one of these people and I thought the same at the same period of involvement.
Those of us who have stayed with the games, often come to find ourselves fortunately
mistaken. Although a few difficult scenarios do exist that may be near impossible,
in all actuality it is a very small number. The point that is often overlooked
is; that a good amount of these scenes contain only one possible way to achieve
victory. Unlike other wargames where one can basically alter history to achieve
a desired result, SB scenes usually require that you to find the only route
to this victory that may exist.
1. Think like a Grunt.
The best avenue of approach to squad battles tactics as a newer player is to place yourself down on the killing field. Would you advance across open terrain that stretched for 250 meters with an enemy HMG watching your every move? Would you waste 800 of your 1000 rounds firing at a target you could barely see? Would you gaggle your troops together with no dispersion so an enemy shell could take out half a platoon in one shot?
Making it as difficult as possible for the enemy to score kills against your units without taking casualties themselves has always been the status quo in warfare. The question in real combat and its simulation is always concerned with the most effective way to achieve this. Since this article is mainly for the beginner, we will start on page one.
Start by developing what is known as a "warning order" in grunt lingo. Ask yourselves the most obvious questions. Does your planned route of attack or defensive position have cover and concealment? Vantage points? Good observation positions? Rallying points if you cannot effectively reach your goals? Like all things applying to 20th century conflict, going "hey diddle-diddle, straight up the middle" usually doesn't get you anything but dead.
OK, now here is where you start thinking like a 100% bona fide ground pounder. A grunt, 11 Bush, 0311, Boonie Rat, mud roller, dirt eater, whatever you call it. Learn to love that muck on the bottom of your boots because you and old mother earth are going to get real close-like here in the near future. Now that we have this out of the way, stop yer' moanin' and groanin', grab your weapon and your web gear and saddle up. There's a war going on. Why ya' smilin' at me troop? Ya think I'm cute?
2. Take cover.
It should be obvious to any aspiring pixel Infantry Officer, SNCO or NCO that leaving troops exposed in areas of little or inadequate cover is not good medicine. However, as trivial as this seems, it is often overlooked at times by newer players. Why is this?
Personally, I believe this has to do with the over zealousness of newbies wanting to engage the enemy. Seeming to rate as the number one fault of newer players, this act of being in such a hurry to cause the enemy damage often ends up in causing more harm to themselves. Newer players will leave a squad or squads exposed in uncovered terrain due to having fired their full movement allowance at the first enemy target they see (and often at max ranges). More often than not these same units tend to get chopped to ribbons by enemy return fire and this boot tactic brings the "panic and spray" image to the mind of a vet.
Maneuvering to a location with good cover that is also possible to reach with minimal casualties is usually paramount to victory. When applied to the offense or defense, this same location should be one from which you can strike at the enemy effectively with the means at your disposal
3. Hey John Wayne, GET DOWN!
Yes, squads automatically hit the deck if fired upon. However, this does not take into account the opening volley against these troops. If you expect enemy contact during your defensive phase, grab some deck at the end of your turn. Going prone (toggle on ground) costs 0 MP, so it is wise to use it. (Getting back up costs 3 MP). Many times I have tore into an enemy platoon advancing to contact that is not prone and caused some serious casualties. While under fire, staying prone (crawling) while maneuvering short distances often keeps casualties lower than standing up and running for it.
4. CEASE FIRE! CEASE FIRE!
Newbies will fire at anything and everything from any range with any weapon that will reach a spotted unit. If you want to win, you need to tie a knot in that trigger finger. Professional soldiers fire only at what they can hit. The individual rifleman is taught to maintain as much stealth as possible. Utilizing this stealth, most firefights tended (and still do) to happen from very close ranges. At these close ranges, a well trained soldier can annihilate the enemy quickly and thoroughly, if he maintains the element of surprise.
With this in mind, imagine the amount of damage you can cause at very close ranges. Would it not serve you better to lure the enemy to a very close killing proximity where weapons can be applied to a higher level of efficiency? More often than not the answer is yes. The more you exercise this philosophy and the better you become at it, the better pixel infantryman you evolve into. If you have an itchy trigger finger put your mouse on safety.;-)
5. Don't spread yourself too thin.
Take a look at the terrain, the objectives, and the routes available to reach these points in minimal time with minimal losses. Next, look to the amount of troops at your command. At this point, come to grasp with what you can effectively defend or attack. Attempting to cover too much with too little can be catastrophic. This may involve sacrificing an objective or two to the enemy. If you can stand to lose a couple 10 point objectives and maintain an equal or favorable position with the enemy, then it is usually in your best interest to do so. Resist in force where you can cause your opponent the most casualties, and attempt to make up for lost points in that aspect.
6. Change weapon loads when applicable.
Switch 40mm GL's to canister when the enemy becomes adjacent. Recoilless rifles, antitank guns, missile launchers, and tank guns should switch back and forth between weapon loads when firing at hard or soft targets. Canister rounds work good against soft targets in most terrain, give buildings and the like. When enemy soft targets units enter a fortified hex, I switch to HE. I fire at all vehicles with AP, if available.
To do this, first highlight the weapon you want to switch loads. Next, go to the bullet icon on the toolbar. When you hit it, it will bring up a dialog. Switch the weapons to the type of round you want them to fire and then fire away. Right clicking on the picture of the weapon in the unit dialog at the bottom of your screen will reveal what load is currently in the weapon.
7. Dropping and picking up weapons.
I have a 10 STR squad of Marines armed with M16's, an M60 and an M79 GL's. This squad is in a hex with 3 AK 47's at 98% status and I want to pick them up because my M16's are only at 56%.
· First off, I make sure I have at least 8 MP (this is the cost to pick
up weapons, dropping them is 0 MP) I select the squad and hit "unload/drop"
(arrow pointing to left button) on the toolbar. All weapons will be dropped.
Now, I have a squad without weapons, but no need to panic, I'll remedy that.
· Secondly, I make sure nothing else is highlighted in the squads hex
that I want to pick up the AK's. (The best way to do this is to click off the
stack and then back on it). I then highlight the weapons I want to pick up,
starting with the AK 47's, then the M60, followed by the M79 GL's and the remaining
4 troops would have to stick with the M16's so I highlight the M16's as well.
Lastly, I highlight the squad I want to pick them up.
· Finally, I hit "load/pickup" (arrow pointing to right button)
on the tool bar and now my squad has picked up the Kalashnikovs, the M60, the
M79's and the M16's. At this stage, all of my troops have been rearmed. 8MP's
have been used, and the ROF for each weapon is reduced by 1 for this turn only,
giving them a max ROF of 2 due to the MP usage.
8. Toggling hold fire.
Though toggling hold fire can be very effective, it is a touchy subject and
is a trial and error type episode when used in certain situations. To hold fire
on a weapon or weapons, first select the weapon(s) you want to hold fire. Next
go to "command" on the tool bar and choose toggle hold fire. Do the
reverse when you want to toggle hold fire off. (Select weapon-go to command-toggle
hold fire off)
9. Detecting Enemy effectiveness.
Newer players to SB I have combated often relay the fact that it is difficult
for them to realize when an enemy squad is at a low number of men and ineffective
unless marked with "P" or "D". This is due to the fact that
they do not know exactly how many troops they have killed in the target squad.
Though all of the following are not 100% reliable, they will usually give you
an idea of the level of your enemy's status.
· Tracer length- if enemy tracers are low in number, the squad is not
delivering effective fire. 4 tracers is max effective fire, with 1 tracer being
least effective. Ineffective fire (short tracers) may be due to any of the above
states or low weapon status due to ammo consumption.
· Weapons counters. If a squad moves from its position and leaves behind
a tidy little stack of weapons counters, you have caused some hate and discontent.
· Are they dead? - When a weapon is fired at you it appears to the right
of the enemies character sketch. These units that stay within LOS will continue
to display these weapons unless their carriers have been killed and the weapon
has been dropped. If you have fired on the unit, highlight the unit that is
in question. If these weapons are no longer visible or appear to the left of
the character sketch...you have killed the bearers of said weapons, or your
enemy has dropped them. (I doubt the latter)
· Well, they're not dead. If not hearing these weapons fired after the
initial time and then highlighting the enemy squad reveals that they are still
present, your opponent may be doing a number of things. The most likely situations
are the following: He is waiting for you to get to a closer range to deliver
more effective fire. You are out completely out range for said weapons or he
is conserving ammunition and status. He may also do this if your own troops
are shaken from high casualties and are pinned, demoralized or a combination
of both and he feels minimal threat from your presence.
10. Killing Factors vs. reduced squads.
Choosing one target and attempting to annihilate it to the last man by fire
combat does not usually work well in this game. For example, if you have a company
of troops with high effectiveness pouring it on to one squad that has been pinned
in the open for 3 rounds with seemingly little result, the target squad has
probably suffered quite a bit of damage. This is almost guaranteed when the
enemy unit in question is delivering ineffective return fire on your units (short
tracers).
As a squad suffers casualties in a 40m hex in Squad Battles, the lower the "crowding
factor" and the harder it becomes to score kills vs. said unit. An allied
squad in Nam usually numbers 10-12 men. A NVA-VC squad can be anywhere from
4-12 troops. Japanese squads can get upwards of 15 men, while USMC squads in
WW2 are 8-12 strong. While high numbers are excellent for the assault, all these
bodies packed in a small space tend to take higher casualties as a result of
fire combat, especially when stacked.
At this stage, highlight the enemy unit and recon it as described in the last
section. If so reduced, other than the spotting capabilities of this unit at
this strength, the amount of damage it will be able to cause on average is usually
considerably low. Wasting rounds on an ineffective enemy unit is exactly that
- a waste.
Again, you need to decide for yourself given the situation. If the target squad
is scoring kills on your units at low levels of effectiveness, then said squad
is very lucky and there is not much you can do short of continuing to attempt
to destroy it completely. If the squad becomes a terrible nuisance in the aspect
of gathering recon against you or killing your troops, maneuver a squad or two
adjacent and assault it. This tactic usually finishes off low strength squads.
11. Target selection.
In this game, officers are usually my number one priority. If the enemy is foolish
enough to send an officer into the open, or if he walks into an ambush with
an enemy squad(s), or alone, I fire the majority of my weapons at said leader
or stack. What this can accomplish is a multitude of things if the officer is
killed.
The enemy now has a leaderless platoon and has some serious issues that have
to be dealt with.
As a squad or squads is sometimes pinned when stacked with an officer that becomes
a casualty, they may now have an isolated unit in the open and no platoon leader
to rally them. If the squad is not pinned...pour fire on them until they are.
Once you have achieved this, you can now make the enemy squad a low priority
target as their effectiveness has been reduced significantly. The only way for
the enemy to reverse this situation is to either retreat and demoralize or bring
forth his Company commander to attempt to rally the squad(s). If said CO becomes
visible, let him have it just like the Platoon commander. In most cases the
enemy has gotten the drift before this happens and the unit(s) will slither
away to cover, demoralized and ineffective.
When playing the VC-NVA in SB Nam-TOD an exception exists in the form of the
enemy using airborne recon. If I spot enemy choppers, they always take first
priority. I usually pop a few shots at a nosy helo with a weapon that has a
decent chance of downing it like a 12.7mm, an RPD or an RPG if in range. If
the helicopter is not destroyed or made immobile on this turn and stays in LOS
I will deliver the highest volume of fire vs. the airborne target as I can possibly
muster on the next turn. In the event that this still does not destroy the target,
it will usually deter even the most hardcore of the lot from further probes.
In most Nam scenes, a downed chopper is quite a few points to swallow if eliminated.
This is especially true, if it is loaded with passengers when it is destroyed.
I have lost UH-1's that are fully loaded, at ranges of up to 1,200m from 12.7mm
MG's. This was a loss of 31 points (16 for the chopper, 5 Crew+10 grunts). So
beware the DshK.
Next on my list of priorities are vehicles and or heavy weaponry. If I am spotted
by these unit types, (tanks, etc), I engage only if I have weapons that can
damage said targets. If these weapon types are not in my arsenal and I am not
dug in, I disengage.
Lastly my fire goes to individual squads. Again an exception of priority exists
in the form of being confronted by numerous enemy squads in the adjacent proximity.
12. Use of leaders.
A leader with a good rating is an excellent weapon. The ultimate application
for myself when using these unit types in fire combat is to leave them one hex
behind a platoon and out of enemy LOS if possible. When one or more squads are
pinned, I retreat the affected squads (they demoralize) to the adjacent hex
with the concealed leader and attempt to rally them. When rallied, I send them
forth again to fill the hole in the line.
13. Direct Fire methods, fact or fiction?
I use selective fire at ranges over 200m only with rifle squads. When enemy
units close to 4 hexes (160m) or less, I just select the squad(s) and let every
weapon rip at once. Mathematically, I do not know if this produces better results,
but I swear by it. I have annihilated a fresh 8 man squad with two attacks while
using this method.
When I need that critical pin result on an enemy bunker, I totally unload as
well. Everything I have goes down range at this point until I get this desired
effect. While playing SB Nam and TOD, I usually toggle hold fire on LAW rockets
until I need them for this type of attack. The most lethal combo in the before
mentioned game that I have noticed is to stack a Marine bazooka team with a
rifle squad. Select both squads-all weapons and fire like a madman. Now, sit
back and watch that yellow P pop up with a quickness, followed by that big red
D. Happens more often than not.
14. How to fire Support Weapons, Mortars, Artillery, Naval Guns and Air Strikes
"blind" without sending your own troops home in a bag in the process.
Firing "blind" may be necessary if a leader or FO (Forward Observer)
with a radio cannot achieve LOS to the target area. Indirect fire (IF) weapons
with an effective casualty radius (ECR) of 80m (2 hexes) or more can cause as
much damage to friendly troops as the enemy. The safest way to deliver fire
with these types of IF weapons, when forced to fire in this mode, is to "fire-long".
Firing long in artillery lingo and in game terms constitutes plotting support
strikes a varying number of meters (hexes) behind what one want to shell with
them. This is done in hopes of catching them in the shells' blast radius while
avoiding hitting your own troops. The bigger the ECR, the "longer"
you should fire. The reverse of this, "firing-short" can be disastrous
when a shell from a 5" Naval gun (for instance) lands directly in the center
of a company of your own men. Blind artillery fire is dangerous and maneuvering
an FO with a radio into LOS of the target area before the strike is available
is the preferred method of calling in support. This method I have mentioned
above is for the situations when it seems that the same FO cannot obtain this
LOS, due to constant enemy relocation.
It is also critical that you pay attention to the delay of your support missions.
When you are starting to think about needing support, you need to check the
minimum-maximum delays. For instance, if it is turn 4 and you realize that you
need to hit the target area by turn 8 with an F4's 500lb. bomb, you had better
get on the horn if the minimum delay is 2-3 or higher. That mission may not
come as soon as you hope and this simulation one turn can win or lose or a scenario.
I usually make a mental note of my support missions and try to pre determine
a turn I am going to call them despite my FO's position. I would rather take
my chances "firing blind" than pass up the opportunity to use these
weapons in the game.
15. Spotting, getting spotted, holding fire.
Personally, when in the defense and when attempting to spot the enemy, I often
place a few single squads in covered hexes with good LOS over the battlefield.
I also place a leader close to this unit if available and out of enemy LOS.
If the spotting unit becomes pinned or demoralized, I pull them back out of
sight, rally them and send them back out to recon once again like mentioned
above. This keeps the unit fresh and keeps the leader alive by keeping him out
of sight.
In the defense and in general (unless against helos) I usually avoid taking
pot shots at the enemy with support weapons at longer ranges. Using these important
weapons in this "plinking" role and at these ranges usually results
in high ammo expenditure with low results. When the enemy closes to assault
objectives or terrain at close range, friendly units that have chewed through
1/2 of their ammo "spraying and praying" from extreme range can cause
serious problems due to their lowered status.
Since the defense usually grants you the advantage of choosing your terrain,
leaving the bulk of ones force out of sight and in reserve until the enemy shows
in force is a sound practice. Toggling hold fire on Assault and Battle Rifles
until the enemy closes to where they will be very effective (3-4 or less) is
usually a good plan. Toggling hold fire on all weapons until the enemy is "danger
close" can spawn some vicious ambushes. In close quarters, I attempt to
leave a light "screening force" out in front of my defense to be spotted
as "bait". When the enemy comes forth to destroy these units, your
reserves are ready and waiting to cause serious damage. If he catches on, and
starts to destroy these units "piecemeal" than it is wise to move
to other options.
FINAL EXAM
The Infantry in the attack vs. a fortified enemy position
1. Preparation
First, you are going to have to come to grips with the fact that you are going
to take a lot of casualties when you need to route the enemy out of a prepared
defensive position. We're going to teach you how to make this the least number
as possible and insure that we take more of the enemy with you when you go.
When troops move to dislodge the enemy from a prepared position they need an
effective base of fire (BOF) covering their advance. Accomplishing this with
each individual SB game takes a bit of "trigger time" and usually
doesn't happen overnight. A solid BOF and the following assault against your
enemy is a "combined arms" type effort and consists of the application
of everything we have covered above.
When we attack what will this entitle to be done so effectively? Our attack
should consist of using support strikes to "soften" the enemy defense,
knowing what squads and what weapons to use in the BOF's formation, what weapon
loads to employ, what units will comprise your advancing elements and what route
they will take, when and where to assault, when to commit reserves and when
to hold fire for certain weapon types and when to rock and roll with everything
we have. This can be a lot to digest for even a veteran player.
Using the above as a reference, I believe once you can assemble an effective
BOF for an offensive maneuver against a prepared enemy defense, you have become
a well rounded SB player. The better one is at it, the grander their knowledge
of basic infantry tactics and the mechanics of the game system over all. If
a player is skilled enough to effectively develop the situation, a sound defense
will come very easily.
2.Assembling your BOF and assault formation(s)
A solid Base of Fire should consists of units that have been deployed to good
observation points with line of sight (LOS) to the entire target area. Ideal
in this role are HMGs and other support weapons like mortars or vehicles (tanks,
gunships, etc). If rifle squads help compose this BOF, they should be units
with lower morale or lower quality leaders than the troops that will compose
your advancing formation. (If any variation of morale or leadership quality
exists in your command.)
Yes, you want your assault force to be "better" troops, and not "fodder".
As your advancing force will more than likely take higher casualties than your
BOF while engaging the enemy at closer ranges, these men will need to recuperate
rapidly from disruption, pinning and demoralization. High morale and good leaders
will be essential. Lower quality units in this role will just get shot up and
have minimal effects on the enemy with return fire.
As these units are moving into position your support strikes or smoke screens
(if available) should be starting to fall onto or in front of the enemy positions.
Once you have maneuvered these units into position, it is time to move out and
on to the next phase.
3. The hard part = maneuvering under enemy fire into assault range
Having set your attack into motion by opening up with your BOF, caution should
now be taken in assuring that your forward elements do not prohibit your BOF
from engaging enemy units that may expose themselves in the target area during
their advance. This situation is avoidable by choosing a route that does not
allow your spearhead to cross your BOF's line of sight (if available).
Forward squads should also avoid blocking other advancing units LOS if this
is possible. This succeeds in providing as many units as possible with clear
fields of fire to potential enemy movement. Assigning a platoon a "field
of fire" (FOF) and then designating areas of responsibility to individual
squads during your offensive phase (your turn) is often massively effective.
If successful in achieving this with advancing squads and in combination with
your base units, an extremely high volume of fire is delivered to enemy defenders
that may expose themselves during your defensive phase (the enemy turn). If
you can accomplish this as described, it will almost absolutely cause enemy
units to abandon any plans of occupying positions that are vulnerable to this
type of approach by making their lives living hell by causing casualties when
trying to enter the target area.
In the offensive phase (your turn) and as you are closing to the target area,
use this combination of BOF and advancing squad fire to disrupt-pin-demoralize
enemy units in LOS. Once you have pinned one squad, move on to the next...pin
it, then the next...and so forth. What this accomplishes is reducing the effectiveness
of the enemy's direct fire while maneuvering towards his position. Casualties
will still be taken, yet it will be far less number than if the enemy where
firing at peak efficiency. If this is working as planned, you are now conducting
an effective offensive base of fire while advancing to contact. Insist on taking
the shortest routes from covered hex to covered hex if possible and avoid stacking
if forced into the open during this "leapfrog" type maneuver. Sometimes,
you will get hit hard despite. In this circumstance, you just have to take your
lumps to get where you need to be. Once this has been done to your satisfaction
and in the time you have allowed yourself to do so, it is time to advance to
the next phase.
4. The Main event
Now it's time to hook and jab. The only "open" terrain you should
engage in is this last stretch to the enemy position. Assaulting is a risky
business in SB, yet if done correctly it can be a devastating event. What have
you done so far?
· You have used your BOF and IF weapons to "soften" defenses
or lay smoke screens while your forward squads have advanced.
· You have effectively used target selection to produce desired results
on enemy leaders, heavy weapons and machine guns.
· You followed this up by laying into the remaining non-affected defenders
with your advancing squads.
· Finally, you looked at where your "prep" of the target area
has produced the best results in the way of damaging the enemy.
A good opponent will have moved his forces during his turns to patch holes in his own lines, so now you need to get up there and exploit these weaknesses as quick as possible. Granted, this may be a problem if he has a wealth of reserves. Once maneuvered to the adjacent hexes, exploit the soft spots of the enemies line by assaulting in force against his weak points against pinned or demoralized units.
Assault in prone (on ground status) if possible. An assault cost 8 MP's. A squad that is toggled "on ground" receives the protection benefits of being on the ground and can assault up to 3 times in a single turn (regardless of terrain) if doing so successfully without being pinned. A personal favorite tactic of mine is to pin or demoralize the enemy squads to the direct front and then attack with a stack of fresh squads (a platoon or so) and sweep them down the line in 3 successful assaults. On average, I attempt to out number the enemy at odds of at least 1.75 to 1. Higher ratios along the lines of 2 or 3 to one are ideal, (especially vs. IJA's high numbers and morale) but one has to work with what he has at hand at the moment. If units fail in their assault and are pinned, that friendly leader should be close behind. Drop the units back (they demoralize) out of sight, rally them and get them back up in the fight.
Adding extra units to your assaults may be necessary to achieve you desired results. The possibility may also exist that squads "rushing to the aid" of friendly squads may not be able to go prone and assault as well. The decision to commit them in this manner is up to the individual. I usually do it if I control the momentum at which the battle is currently progressing, and if the target squad(s) has suffered decent damage.
Discontinuing the attack at this point may be wise due to your level of recon, yet you should shoot up what you still see with the remaining attacks at your disposal. Close combat can be no fun on the return end...so you need to cause as much damage as you can, while possible. They key is to a successful assault is to "bully your way in" by hitting hard and continuing to hit constantly at close quarters.
5. Reserves
Try to keep a reserve if possible. Avoid committing every thing you have if you don't have to do so to maintain control of the situation. Leave an unspotted and fresh platoon out of site. Pull them up when you need them to regain lost control or when you want to deliver the "killing blow" to an enemy counterattack while in the assault.
In closing ...
Always attempt to leave yourself an alternative option and avoid putting "all your cookies in one bag". Weigh the situation as it progresses and attempt to stay in control. If the enemy is responding to your initiative, then that is exactly what you have; so you need to exploit it to the fullest. If you are responding to the enemy's movements, then he is in control of the battlefield. At this point, you need to think of what avenues of approach you need to take to reverse this. One of my gamer friends once said that playing wargames is like being a Police Officer in a potentially hostile situation. "Take charge of the situation and stay in charge." Yes sir, that pretty much sums it all up.
Well that's going to wrap it up for this session, troops. Now you're half a grunt. When you can make what was discussed happen for you while playing PBEM, you'll be a 100% bona fide pixel ground pounder. I can only hope this offers a guiding hand to newer players of SB, (and vets as well) as the amount of frustration I have seen on a few MB's have lead me to attempt to put the fun back into a great game for those who may have been led astray by a sound gut stomping or two, or ten for that matter. In closing, you have to want to be good at this game, because it takes a bit of homework, but you are a "grognard" aren't ya'? You want the real deal, right?
Finally, the best and quickest way to learn the system is to play vs. a skilled opponent and ask for help. Most vets will be very willing to assist you. Try things on a trial and error basis. Players who seek an adversary that they can annihilate with relative ease does nothing to improve their skills. Though a win here and there is good for the ego, it rarely does much to improve one's skill if against an opponent less skilled than yourself. When you do find that formula that works time and time again versus an opponent that you found nearly impossible to beat before, this is when you are starting to get an excellent grasp of the game(s), and when you need to stay away from me. Now get out there and get a body count worth telling HQ about.
by Sgt. Tom Ciampa
[Editor's Note: See LOD Issue No. 2 (July) for the background introduction to this continuing column.]*
*New additions to this list are written in Italics and the list will be re-alphabetized in each subsequent issue.
MACV [Military Assistant Command Vietnam]
TOW* [Tube-launched, Optically-tracked, Wire-guided missile]
*Learn about this one the hard way by playing the Communists in TOD's Kontum
CAP [Combined Action Platoons]
LRRP [Long-Range Reconnaissance Patrols]
MAF [Marine Amphibious Force]
MRF [Mobile Riverine Force
MEB [Marine Expeditionary Brigade]
PACV [Patrol Air Cushion Vehicle]
PAVN [People's Army of Vietnam]
PLAF [People's Liberation Armed Forces]
PBR [Patrol Craft, River]
PCF [Patrol Craft, Fast]
SAS [Australian Special Air Service]
TACMS [Tactical Missile System]
TAOR [Tactical Area of Responsibility]
VIET MINH [Vietnam Doc Lap Dong Minh Hoi] (The Vietnamese Independence League)
………………………………………………………………………………………………………..
AATTV [Australian Army Training Team Vietnam] A 30-man team of jungle warfare
experts
sent to Vietnam in 1962.
AFV [Armored Fighting Vehicle OR American Friends of Vietnam 1955-1975] A private
association promoting United States interests in Vietnam.
CIDG [Civilian Irregular Defense Group] Early U.S. Special Forces (Green Berets)
isolated
camps in remote areas established in 1962 to extend the influence of the South
Vietnamese Government.
DMZ [Demilitarized Zone]
EOGB [Electo-Optical Guided Bomb]
FSCCS [Fire Support Coordination Centers]
LGB [Laser-Guided Bomb]
LRRP [Long Range Reconnaissance Patrol]
SAM [Surface-to-Air Missile]
SAR [Search and Rescue]
VVAW [Vietnam Veterans Against the War]
by Sgt. Tom Ciampa
Claymore mines are little more than static shotguns. They are produced under license outside of America, and are routinely copied by unauthorized Third World industries often ending up in Guerilla hands. When triggered they shoot a matrix of metal balls over a defined arc. The American M18 Claymore Mine is the best example of this type of mine. It can be fired by a trip-wire or by remote control and spreads 700 steel balls over an arc 60 degrees wide and up to 2 meters high. Among the fragment-producing anti-personnel mines, claymores are especially lethal and can be dangerous out to ranges of 50 meters. They have a 95 percent casualty probability.
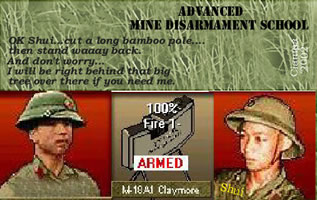 The
"mine" weighs 3.5 lbs. (1.6 kg), is a little larger than a paperback
book (a pocketbook) and has a folding set of "support legs" permitting
it to set securely in the ground to face a specific direction. It is also slightly
curved with the message "Front Toward Enemy" written on its face.
It is said that a favorite tactic of the VC was to sneak up on a claymore at
night and turn it around. Then returning to the ambush site the next day, the
VC would show themselves, and the G.I.s would detonate the mine blowing themselves
up.
The
"mine" weighs 3.5 lbs. (1.6 kg), is a little larger than a paperback
book (a pocketbook) and has a folding set of "support legs" permitting
it to set securely in the ground to face a specific direction. It is also slightly
curved with the message "Front Toward Enemy" written on its face.
It is said that a favorite tactic of the VC was to sneak up on a claymore at
night and turn it around. Then returning to the ambush site the next day, the
VC would show themselves, and the G.I.s would detonate the mine blowing themselves
up.
References: Guerilla Warfare Weapons, Terry Gander, Sterling
Publishing, New York, 1990, 135 pages.
The Encyclopedia of the Vietnam War, Spencer C. Tucker, Oxford UniversityPress,
1998
Did You Know?
… More from Mssrs. Dunnigan and Nofi
[Reference: Dirty Little Secrets of the Vietnam War, 1999, Thomas Dunne Books]
by Sgt. Tom Ciampa
….THAT "there were several hundred Asian tigers in the Central
Highlands of Vietnam. Fully grown specimens weighed in at seven hundred to eight
hundred pounds, their heads as big as the rucksacks carried by the G.I.s. Even
more elephants roamed the area weighing one and a half tons, but were considerably
more docile than the big cats. More numerous a natural enemy of soldiers on
both sides were poisonous snakes including some impressive species of cobras.
Dunnigan and Nofi include the rats in the list of problem wildlife there, humorously
allowing as how most of them working for the Communists. G.I.s often came across
tiger tracks near their camps in the Highlands as the tigers liked to roam around
the camps at night but never seemed to step on the land mines. For the Americans
they were a source of some degree of nervousness. They were, however, a larger
threat to the thousands of North Vietnamese traversing the Ho Chi Minh trail
as the tigers loved to stalk for food and fun. Some proof of encounters were
documented by either a dead tiger or a tiger's meal found in the bush as well
as some semi-documented eye-witness accounts. Some of the more nerve-wracking
encounters weree on patrol at night and so were the tigers. The patrols moved
in a stealthy manor and, of course that is how tigers operated, and on occasion
the two parties met. North Vietnamese mine laying patrols seemed particularly
good prey for tigers while they squatted in a road, at night, quietly digging
them in. Encounters with elephants were rather uncommon. Being vegetarians
they weren't really a serious threat of any kind. There is one documented incident,
however, of an NVA pack elephant stalking a patrol in a rage for days finally
catching up to it and stepping on one soldier as they fled resulting in an unusual
radio call for medevac. Snakes are a whole story of its own and we will
save the details for another issue. However, in the way of a synopsis, they
could be encountered anywhere, outside or inside. Often it was the point man
of a patrol that encountered them and if one of several species of "constrictors,"
many species of which were over ten feet long, they usually slinked away. Cobras,
however, were a different matter. Highly poisonous, always bite and almost always
fatal, are also able to spit venom in the eyes of a soldier from five to six
feet away. An encounter with a cobra was most often dealt with by gunfire, a
lot of shouting and beating feet. Rats, too is a more detailed story
of its own for a future article. Suffice to say here, they were, bugs excepted,
the most numerous of any wildlife the soldiers ran into. Rats like being near
people because people have food and the Americans had the most food of all.
Most of the rats they saw were in the underground bunkers and tunnels of the
enemy. Naturally G.I.s had lots of intolerance for the critters and had some
creative ways of dealing with them. More on that in the future too. The Montagnards
on the other hand viewed rats and themselves as having a symbiotic relationship.
They caught them and cooked them. They never understood why the Americans didn't
want to join them in the feast!"
The Odd Angry Shot
"Everyone's got to be somewhere, and
you're here, so you better get used to it"
by Sgt. Glyn Hargreaves
Certificate: 15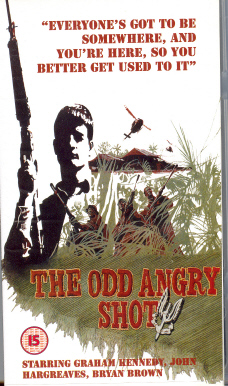
Running time: 87mins
Director: Tom Jeffrey
Starring: Graham Kennedy, John Hargreaves, John Jarratt, Bryan Brown,
Graeme Blundell and Ian Gilmore
Year: 1979
At last I get to review the Vietnam film I can relate to, the film was originally a novel I believe based on the experiences of the author in the SAS during Vietnam.
The story revolves around a group of four friends, in an Australian SAS regiment during Vietnam in 67, and unsure of why they are packed off to war they didn't start.
This movie shows what most Vietnam movies don't, the extreme boredom felt by soldiers between the high pressures of combat and patrolling, and shows some of the true professionalism of the SASR in combat during Vietnam. If you are looking for John Wayne heroics like in We Were Soldiers this film isn't for you. This film shows a more realistic side of combat to my mind, building up tension and making it more paralysingly real at times. Not your usual Hollywood firing-from-the-hip style of NAM films.
There are lots of humorous scenes in this movie; the humour is very grim at
times, like the scene in which a badly wounded soldier asks, "Will they
cut me leg off?" "No unless they're p****d, they won't mate."
Another good scene is the Scorpion race against their neighbouring American
unit. Also lots of beer drinking…hey it's an Aussie film!!
The film was shot in Queensland but does a good job of looking like Vietnam, most of the actors will probably be unknown in the US. Though there is a very young Bryan Brown who some will remember from his F/X Murder by Illusion days.
If I can pick out some minor quibbles it is that some of the actors don't look the part, Graham Kennedy for one, though he is very droll and plays his part well. The message this movie is trying to bring across is lost to some degree during the process. That aside, it is one of my favourite Vietnam movies
"The Odd Angry Shot" was not given enough credit during its US release,
so it is generally unknown in the US. If you can find it on Video it will be
worth a night's entertainment
8/10
Should available on Video.
(contributed by Binh Nhat David Stotsenburgh)
Q: The famous quote "It became necessary to destroy the town to
save it." Refers to what Vietnamese town?
Prizes Offered for the 2nd Trivia
Contest*
The winner of the November Issue of LOD's Trivia Contest will choose from among any one of the following prizes:
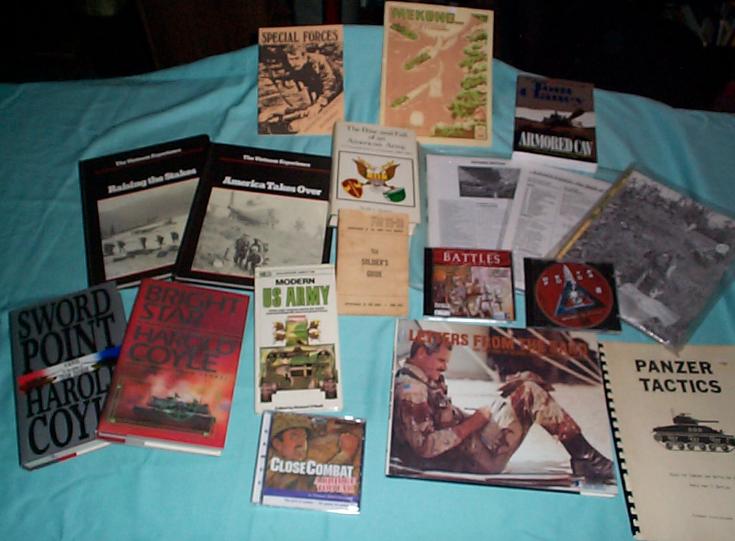 Books:
Vietnam Experience: Raising the Stakes; Vietnam Experience: America Takes Over;
The Rise and Fall of an American Army; Modern US Army weapons reference (1986);
Tom Clancy's AIR CAV; FM-21-13 (Field Manual for US Army personnel - 1952; or
Letters from the Sand (A compilation of letters home from WWII to the Gulf War
published by the U.S. Post Office in 1991; or Sword Point or Bright Star, by
Harold Coyle author of Team Yankee (New Hardcover 1st editions); battles).
Books:
Vietnam Experience: Raising the Stakes; Vietnam Experience: America Takes Over;
The Rise and Fall of an American Army; Modern US Army weapons reference (1986);
Tom Clancy's AIR CAV; FM-21-13 (Field Manual for US Army personnel - 1952; or
Letters from the Sand (A compilation of letters home from WWII to the Gulf War
published by the U.S. Post Office in 1991; or Sword Point or Bright Star, by
Harold Coyle author of Team Yankee (New Hardcover 1st editions); battles).
Miniature Gaming: A copy of Panzer Tactics, a set of rules for micro-armor battles of WWII; Special Forces: Modern Skirmish miniatures rules; or Mekong…Vietnam (miniature rules for Vietnam tabletop battles).
Board games on Vietnam: First Team (A solitaire game of the Air Cav early in Vietnam); Fallen Eagle: Battle of Khe Sanh; or Vietnam Battles: Hue and Operation Pegasus.
Computer Games: Delta Force (the original first game on the subject by Novalogic; Close Combat: A Bridge Too Far (Microsoft); or The Great Battles of Caesar by Interactive Magic.
*Some are new, some are used, some are collectibles. All are free and
post paid. We hope you will participate.
The Line of Demarcation is the Journal of the Modern Battles Club, a member of the International Wargame Club. © Dierk Walter 2002. Please address contributions to the editor-in-chief, Thomas D. Ciampa.